Introduction: Why Proper Servo Motor Replacement Matters
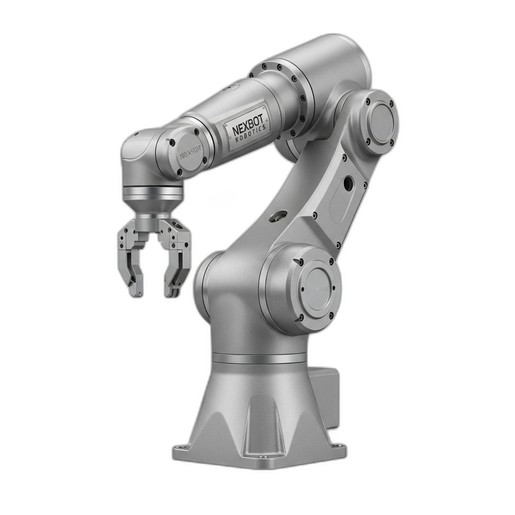
In the demanding world of industrial automation, every component's reliability is critical to maintaining production schedules. The servo motors within an articulated robot like the NexBot R-20 are the heart of its precision and power. When one of these motors requires replacement, performing the task correctly is not just a matter of repair—it's a crucial process that impacts the robot's lifespan, operational safety, and the quality of its output. An improper replacement can lead to premature wear, inaccurate movements, and costly unplanned downtime.
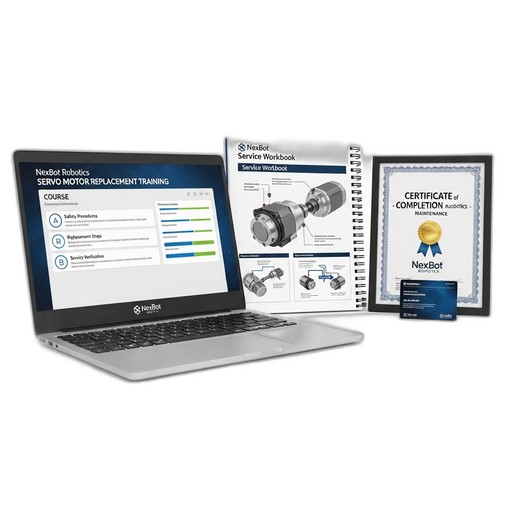
This guide provides a comprehensive overview of the servo motor replacement process for the NexBot R-20 Articulated Robot. While these steps offer a solid framework, we strongly recommend that this procedure be performed by technicians who have completed formal training, such as our Servo Motor Replacement Online Training course. This ensures the highest standards of safety and technical proficiency.
Safety First: Essential Precautions
Before beginning any maintenance procedure on an industrial robot, safety is the absolute priority. Failure to follow proper safety protocols can result in severe injury or equipment damage. Always adhere to your facility's specific safety guidelines.
- Lockout/Tagout (LOTO): The robot's primary electrical disconnect (at the 400-480VAC 3-Phase source) must be de-energized and placed in a locked-out state. The key should remain with the technician performing the work for the duration of the task.
- Personal Protective Equipment (PPE): Always wear appropriate PPE, including safety glasses, steel-toed boots, and gloves.
- Stored Energy: Be aware of stored mechanical energy. The robot arm can move unexpectedly due to gravity if not properly secured. Use certified mechanical braces or hoist supports to hold the arm in a fixed, neutral position before beginning work.
- System Pressure: Ensure any pneumatic or hydraulic systems connected to the end-of-arm tooling are safely depressurized.
Required Tools and Parts
Having the right tools and genuine replacement parts on hand will make the process smoother and more reliable. A typical toolset includes:
- A complete set of metric hex keys and socket wrenches
- A calibrated torque wrench with appropriate sockets
- Wire cutters and strippers
- Multimeter for verification of de-energized state
- Mechanical bracing or rated lifting straps
- Lint-free cloths and approved cleaning solvents
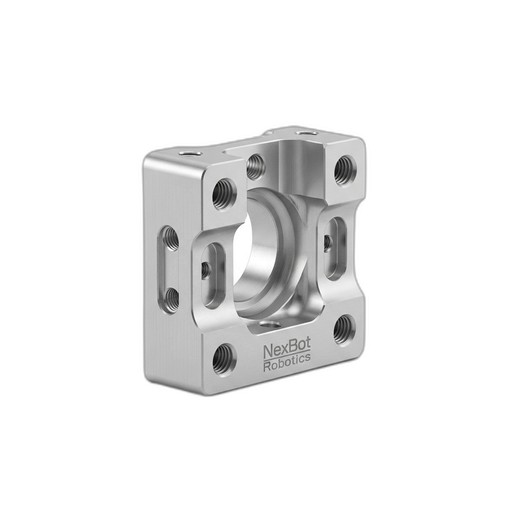
For parts, you will need the new servo motor and a genuine NexBot Servo Mounting Bracket for R-20 (NXB-MNT-SRV-R20). Using a specification-driven replacement bracket is essential for maintaining the correct alignment and structural integrity of the joint. Attempting to reuse a potentially warped or damaged bracket can compromise the entire repair.
Step 1: Preparation and Diagnosis
Confirm the fault. Use the robot controller's diagnostic logs to verify which specific axis motor has failed. Note any error codes, as they can provide valuable information for the repair. Once confirmed, move the robot to a designated maintenance position if possible. Clear the work area of any obstructions and ensure adequate lighting.
Step 2: Powering Down and Securing the Robot
Execute the full LOTO procedure as described in the safety section. Verify with a multimeter that all power sources to the robot and controller are off. Once you have confirmed a zero-energy state, mechanically secure the robot arm. The weight of the arm must be fully supported before you unbolt any motor, as the motor and its brake are often the only things holding the arm in place.
Step 3: Removing the Faulty Servo Motor
- Disconnect Cabling: Carefully label and disconnect the power and encoder cables from the faulty servo motor. Pay close attention to the connectors; never pull on the wires themselves. Disconnect the PROFINET communication cable if it routes through the motor assembly.
- Remove Access Panels: Remove any protective covers or access panels on the robot arm to gain access to the motor and its mounting bracket.
- Unbolt the Motor: Loosen and remove the bolts securing the servo motor to its mounting bracket. These bolts are often under tension, so loosen them in a star pattern to release pressure evenly.
- Extract the Motor: Carefully slide the motor out of its housing. It may be a tight fit, so avoid using excessive force. Note the orientation of any keyways or splines on the motor shaft for reference during installation.
- Remove the Old Bracket: Once the motor is out, remove the old servo mounting bracket. Inspect the mounting surface for any damage or debris and clean it thoroughly.
Step 4: Installing the New Servo Motor
- Install the New Bracket: Secure the new NexBot Servo Mounting Bracket for R-20 to the robot arm. Use a calibrated torque wrench to tighten the bolts to the specifications listed in the R-20 service manual. This ensures the precise fit required for optimal performance.
- Mount the New Motor: Carefully align the new servo motor's shaft with the corresponding gearbox or drive assembly. Gently slide the motor into place on the new mounting bracket. Ensure it is fully seated before proceeding.
- Secure the Motor: Insert and hand-tighten the motor mounting bolts. Then, using the torque wrench, tighten the bolts in a star pattern to the specified torque value. This even pressure is critical for proper alignment and preventing stress on the motor housing.
Step 5: Reconnection and System Checks
With the new motor securely mounted, it's time to reconnect the system.
- Reconnect Cables: Re-attach the power, encoder, and any communication cables to the new motor. Ensure each connector is fully seated and secured.
- Reinstall Covers: Replace all access panels and protective covers that were removed.
- Power On: Remove all tools and personnel from the robot's work envelope. Follow your facility's procedure to remove the LOTO and re-energize the robot controller. Power on the system in a restricted or manual mode.
- Check for Errors: Observe the controller's teach pendant for any immediate error codes. A clean startup is the first sign of a successful hardware replacement.
Step 6: Calibration and Testing
A new motor requires the robot to re-learn the exact position of its corresponding joint. This process, often called mastering or calibration, is critical for repeatable accuracy.
- Perform Joint Calibration: Follow the specific calibration procedure for the NexBot R-20 as outlined in the service manual. This usually involves using a specialized tool or software routine to find the precise zero position for the new axis.
- Test Motion: In a slow manual mode, carefully move the affected joint back and forth to ensure smooth motion without binding or unusual noises.
- Run a Test Program: Execute a simple, slow-speed program that exercises the robot's full range of motion. Gradually increase the speed, monitoring the new motor's performance and temperature. Once satisfied, run a production-equivalent test to verify the robot's ability to perform its tasks with the required precision.
Conclusion: Enhance Your Skills with Formal Training
Successfully replacing a servo motor on your NexBot R-20 is a significant maintenance task that directly contributes to the longevity and reliability of your automation system. Following a structured, safety-conscious process is key.
This guide serves as a valuable reference, but hands-on expertise and certified knowledge are irreplaceable. To empower your maintenance team with the confidence and skills to perform this and other critical repairs, we highly recommend our Servo Motor Replacement Online Training (NXB-TRN-SRV-ONL). This instructor-led course provides in-depth diagnostics, standardized workflows, and the best practices needed to keep your production line running at peak efficiency.