Industrial robots are the backbone of modern manufacturing, operating with incredible precision and endurance. However, like any high-performance machinery, they require regular preventative maintenance to sustain their accuracy and prevent costly downtime. A critical maintenance task is the joint overhaul, typically recommended after thousands of operating hours. This guide will walk you through the essential steps of performing a joint overhaul on a NexBot R-Series robot, ensuring it continues to operate at peak efficiency.
Why Joint Maintenance is Crucial
Robot joints are complex assemblies of gears, bearings, motors, and structural components that endure immense stress during operation. Over time, wear and tear can lead to backlash, reduced positional accuracy, and eventual component failure. A scheduled overhaul, such as the one recommended at the 8,000-hour interval, addresses this wear by replacing key components and replenishing lubricants, effectively resetting the joint's performance clock.
Preparation: Safety and Tools
Before beginning any maintenance procedure, safety is paramount. Always follow your facility's lockout/tagout (LOTO) procedures to ensure the robot is completely de-energized and cannot move unexpectedly.
Gather Your Tools and Parts:
- Personal Protective Equipment (PPE): Safety glasses, gloves, and appropriate footwear.
- Tool Kit: A comprehensive set of metric wrenches, torque wrenches, socket sets, and screwdrivers.
- Cleaning Supplies: Lint-free cloths and a recommended industrial degreaser.
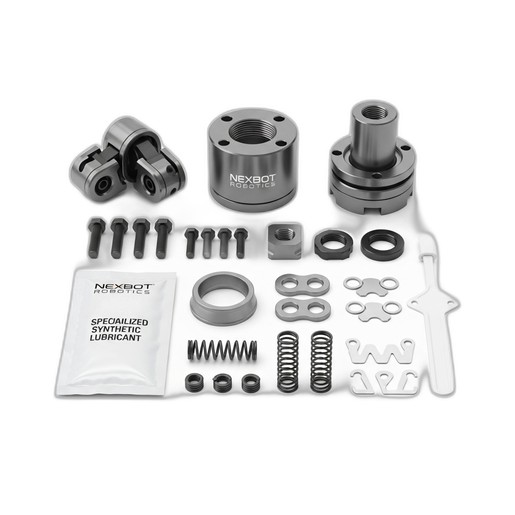
- The Right Parts: Ensure you have the correct maintenance kit for your robot model. The NexBot Drives 762-002 Multi-Part Maintenance Kit is designed for our R-Series robots and contains everything you need, from housing covers and shims to specialized lubricant and high-tensile fasteners.
Step 1: Disassembly and Inspection
With the robot safely powered down, you can begin the disassembly process. Carefully remove the axis covers to access the joint assembly. Proceed methodically, taking photos at each stage to aid in reassembly.
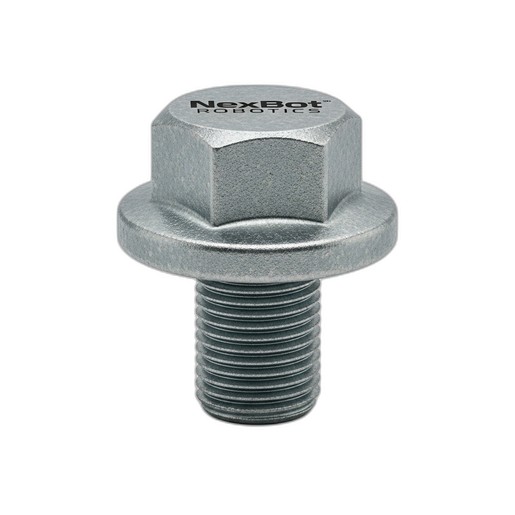
As you remove the structural fasteners, pay close attention to their condition. These bolts are under constant load and should always be replaced during a major service. The old fasteners can be discarded. The NexBot Drives 762-002 kit includes a new set of high-tensile bolts, ensuring structural integrity is fully restored. For individual replacements or other applications, parts like the NexBot Vision NXB-831-BLT M12x1.75 Flange Bolt are engineered to meet the specific demands of robotic applications.
Once disassembled, thoroughly inspect all non-replaceable components like gears and mounting surfaces for signs of excessive wear, pitting, or damage.
Step 2: Cleaning and Component Replacement
Thoroughly clean all old grease and contaminants from the disassembled joint housing and gearing. A clean assembly is critical for the new lubricant to perform effectively and for achieving correct tolerances during reassembly.
This is where the maintenance kit proves its value. Systematically replace the old components with the new ones from the kit:
- Install the new precision-machined joint housing covers.
- Replace wave springs and retaining clips.
- Use the collection of alignment shims as needed to set the proper gear backlash and preload, following the robot's service manual specifications.
Using a complete kit ensures that all critical wear parts are replaced simultaneously with components designed to work together, restoring the joint to its original factory specifications.
Step 3: Lubrication and Reassembly
Proper lubrication is vital for the joint's longevity and smooth operation. The NexBot Drives 762-002 kit includes a pack of specialized synthetic lubricant formulated for high-pressure, high-precision robotic applications. Use the disposable applicator to apply the lubricant evenly to gears and bearings as specified in the service manual. Avoid over-lubrication, as it can lead to excess heat and seal failure.
Begin reassembly, working in the reverse order of disassembly. When installing the new structural fasteners, it is crucial to follow a proper torque sequence and apply the correct torque value using a calibrated torque wrench. This ensures that the joint is secured evenly and maintains its structural rigidity. Under-tightened bolts can lead to vibration and positioning errors, while over-tightened bolts can damage threads or components.
Step 4: Post-Service Checks and Calibration
After reassembly is complete and all covers are back in place, you can remove the LOTO devices and power up the robot.
- Jog the Robot: Manually jog the serviced axis at a very low speed, listening for any unusual noises and watching for smooth movement.
- Run a Test Program: Execute a simple motion program that moves the joint through its full range of motion at progressively higher speeds.
- Check for Leaks: Inspect the joint seals for any signs of lubricant leakage.
- Re-master the Robot: A major joint service will almost always affect the robot's mastering or calibration. Perform the robot's mastering procedure to re-establish its precise home position. This final step is critical for restoring the robot's absolute positional accuracy.
By following these steps and using genuine NexBot maintenance parts, you can confidently extend the life of your industrial robots, maintain program accuracy, and safeguard your production schedule from unplanned downtime.