Introduction: Why the 5,000-Hour Overhaul is Critical
In any high-demand manufacturing or logistics environment, industrial robots are the backbone of productivity. To ensure they operate at peak efficiency and avoid costly unplanned downtime, a robust preventive maintenance schedule is not just recommended—it's essential. The 5,000-hour service interval marks a significant milestone in a robot's operational life. At this point, critical internal components have endured millions of cycles, and wear is inevitable. Proactively addressing this wear is the key to longevity and reliability.
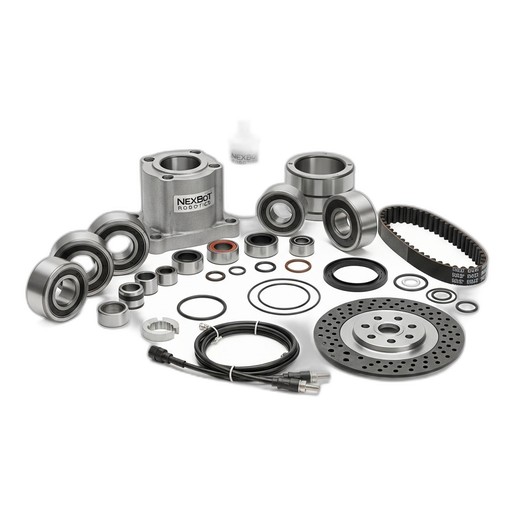
Performing a major overhaul restores the robot's mechanical precision, reduces the risk of catastrophic failure, and ensures it continues to meet performance specifications. This guide provides a detailed, step-by-step process for conducting a 5,000-hour major overhaul, centered around the use of the NexBot R-20 Major Overhaul Kit (NXB-KIT-R20-5000), which contains all the necessary high-wear components for a complete refresh.
Before You Begin: Safety and Preparation
Safety is the absolute priority. Before starting any maintenance procedure, ensure you are following all facility-specific safety protocols, including Lockout/Tagout (LOTO). A successful overhaul also depends on proper preparation.
Safety Checklist:
- Power Down: Completely power down the robot controller and disconnect the main power source at the breaker.
- LOTO: Apply your personal lock and tag to the energy-isolating device to prevent accidental re-energization.
- Release Stored Energy: Safely discharge any stored electrical or pneumatic energy within the system.
- Secure the Arm: Move the robot to its designated maintenance position and apply mechanical brakes or braces if necessary to prevent unexpected movement.
- Personal Protective Equipment (PPE): Wear appropriate PPE, including safety glasses, gloves, and steel-toed boots.
Preparation Checklist:
- Workspace: Ensure you have a clean, well-lit, and organized workspace with ample room to maneuver and lay out parts.
- Tools: Gather all necessary tools, including torque wrenches, bearing pullers, seal drivers, hex keys, and cleaning supplies.
- Documentation: Have the robot's official maintenance manual on hand for specific torque values and diagrams.
- The Kit: Unpack the NexBot R-20 Major Overhaul Kit (NXB-KIT-R20-5000) and verify all contents are present: Bearings, Seals & O-Rings, Grease Cartridge, Timing Belt, Brake Disc, and Cable Set.
Step 1: Joint Disassembly and Inspection
With the robot safely secured, you can begin the disassembly process. Work on one joint at a time to maintain organization and prevent confusion. The goal is to access the internal components that will be replaced.
- Remove Covers: Carefully remove the plastic or metal covers for the target joint axis. Keep all fasteners organized and labeled.
- Disconnect Cabling: Disconnect any motor or encoder cables connected to the joint. Use caution to avoid damaging pins or connectors.
- Component Removal: Following the service manual, begin removing the components in sequence. This typically involves detaching the motor, removing the gearbox assembly, and accessing the main joint bearings and belts.
- Thorough Inspection: As you disassemble, inspect every component for signs of abnormal wear, damage, or contamination. Pay close attention to:
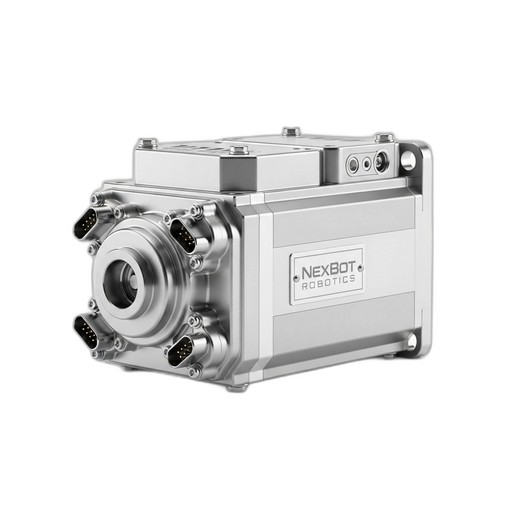
- Servo Motors: Check for signs of overheating, bearing noise, or oil leakage. While components like the NexServo AC30 Servo Motor (NXB-SRV-AC-030-A) are built for durability, this is the perfect time to confirm their condition.
- Gears: Look for pitting, scoring, or excessive backlash in the gear teeth.
- Castings: Inspect for cracks or stress fractures in the robot arm's structural components.
Step 2: Component Replacement with the NXB-KIT-R20-5000
This is the core of the overhaul. Using the contents of the NXB-KIT-R20-5000, you will replace all the primary wear items for the serviced joints.
- Bearing Replacement: Use a bearing puller to carefully remove the old bearings from their housings. Clean the housing thoroughly before pressing the new bearings from the kit into place. Ensure they are seated correctly and evenly.
- Seals and O-Rings: Remove all old seals and O-rings, taking care not to scratch the sealing surfaces. Clean the grooves and install the new seals and O-rings from the kit. A light application of the new grease can help with installation.
- Timing Belt Replacement: Remove the old timing belt and inspect the pulleys for damage or debris. Install the new belt from the kit, ensuring it is properly routed and tensioned according to the manufacturer's specifications. Incorrect tension can lead to premature failure or positioning errors.
- Brake Disc and Cable Set: Replace the existing brake disc and cable set with the new ones provided in the kit. This ensures reliable braking performance and electrical connectivity for the joint.
Step 3: Lubrication and Reassembly
Proper lubrication is critical for the new components. A common mistake is using the wrong type or amount of grease.
- Clean Old Grease: Remove all old, contaminated grease from the gearbox and joint housings. Any remaining old lubricant can compromise the performance of the new grease.
- Apply New Grease: Use the grease cartridge included in the NXB-KIT-R20-5000. Apply the specified amount of grease directly to the gears and bearings as outlined in the service manual. Do not overpack the gearbox, as this can cause overheating.
- Reassemble: Carefully reassemble the joint in the reverse order of disassembly. Use a calibrated torque wrench to tighten all fasteners to their specified torque values. This prevents vibration-related loosening and ensures structural integrity.
Step 4: System Checks and End-of-Arm Tooling Verification
Once the mechanical work is complete and the robot is fully reassembled, it's time to bring it back online methodically.
- Power Up: Remove your LOTO and restore power to the controller.
- Initial Checks: Power up the system and listen for any unusual noises. Check the controller for any new error codes.
- Axis Calibration: The overhaul process will likely have affected the robot's mastering or calibration. Perform the manufacturer's recommended axis calibration procedure to re-establish its precise home position.
- Test Program: Run the robot at a slow speed through a test program that moves all serviced axes through their full range of motion. Gradually increase the speed, monitoring for any vibration, positioning errors, or unusual motor current.
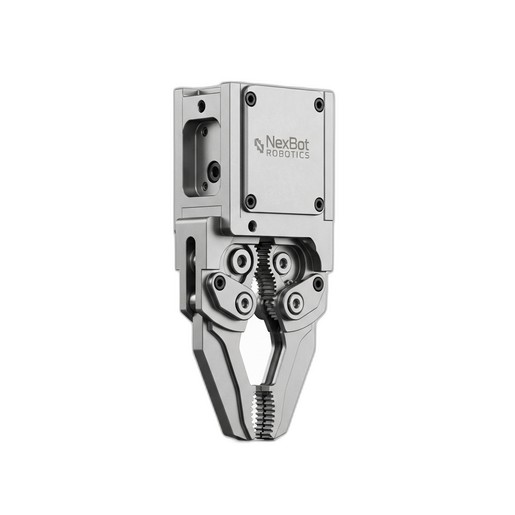
- EOAT Check: This is an ideal time to inspect and test your End-of-Arm Tooling. For example, if you are using a NexBot Robotics ELC412-001 Electric Gripper, command it to open and close, and verify that its force control and position feedback are accurate via its IO-Link connection.
Conclusion: Maximizing Uptime Through Proactive Care
By completing a thorough 5,000-hour major overhaul, you have effectively reset the clock on your robot's most critical wear components. This proactive investment in maintenance, using a comprehensive solution like the NexBot R-20 Major Overhaul Kit, is the most effective strategy for preventing unexpected failures, maintaining production quality, and maximizing the return on your automation investment. Regular, by-the-book maintenance ensures your robotic systems remain a reliable asset for years to come.