Introduction: Setting the Stage for Success
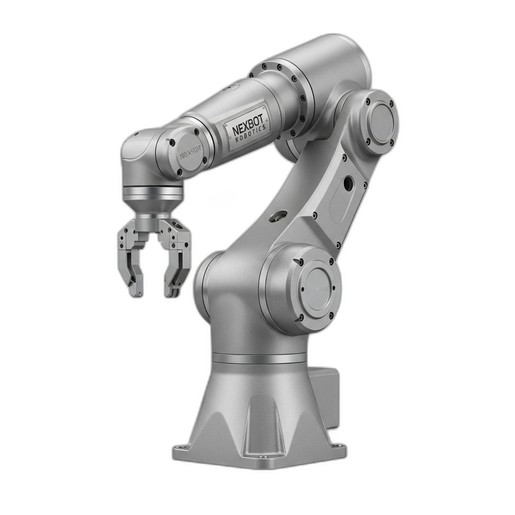
The arrival of a new industrial robot like the NexBot R-20 is an exciting step towards greater productivity and efficiency. However, the performance and longevity of your automation system depend entirely on a correct and safe installation. A methodical approach to mechanical mounting, electrical connections, and initial commissioning ensures that your robot operates reliably from day one.
This guide provides a practical, step-by-step overview for installing the NexBot R-20 Articulated Robot (NXB-ROB-R20-050-A). We will cover everything from site preparation to the final safety checks, highlighting the roles of critical components like mounting hardware and industrial-grade network cables.
Pre-Installation Checklist: Planning and Preparation
Before uncrating the robot, a thorough site preparation is crucial. Rushing this phase can lead to costly delays and safety hazards.
- Verify the Mounting Surface: The R-20 is a powerful machine. Its mounting surface must be perfectly level, rigid, and capable of withstanding the dynamic forces generated during high-speed operation. Consult the robot's technical documentation for specific foundation requirements, including bolt patterns and torque specifications.
- Check Power Requirements: The NexBot R-20 requires a 400-480VAC 3-Phase power source. Ensure a dedicated, properly grounded circuit with appropriate overcurrent protection is available at the installation site. All electrical work should be performed by a qualified electrician in compliance with local codes.
- Map Out Cable Routing: Plan the paths for power, control, and network cables. They should be protected from physical damage, sharp bends, and electromagnetic interference. Ensure you have sufficient cable length to allow for the robot's full range of motion without strain.
- Review Safety Documentation: Familiarize your team with the robot's safety manual. Identify the locations for emergency stop buttons, safety gates, and light curtains. A comprehensive risk assessment should be completed before installation begins.
Step 1: Mechanical Installation and Mounting
With the site prepared, you can begin the physical installation. Precision is key.
First, carefully lift and position the robot base onto the prepared mounting surface, aligning it with the pre-drilled holes. Secure the robot using the specified grade and size of mounting bolts, torquing them to the values listed in the manual. An improperly torqued base can lead to vibration and positioning errors.
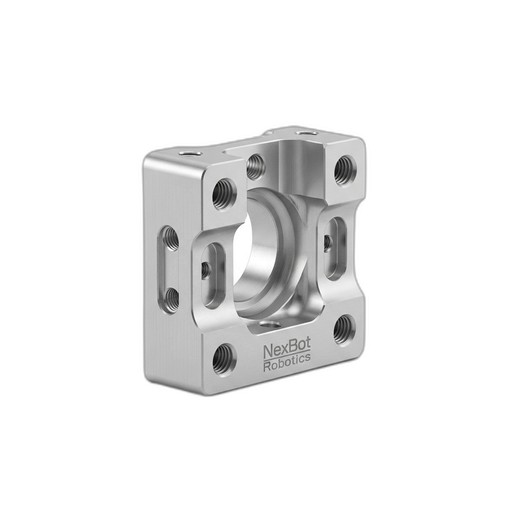
Next, consider your end-of-arm tooling (EOAT). Many applications require a servo-driven gripper or tool. For these, a robust mounting solution is essential. The NexBot Servo Mounting Bracket for R-20 (NXB-MNT-SRV-R20) is designed for this purpose, providing a secure and precise interface between the robot's wrist flange and the EOAT servo motor. Proper alignment here is critical for the accuracy of your application.
Step 2: Electrical and Network Connections
Once the robot is mechanically secured, it's time to connect the power and communication lines.
Connect the main power cable from your dedicated circuit to the robot controller's input terminals. Double-check that the phases are correctly wired according to the schematic.
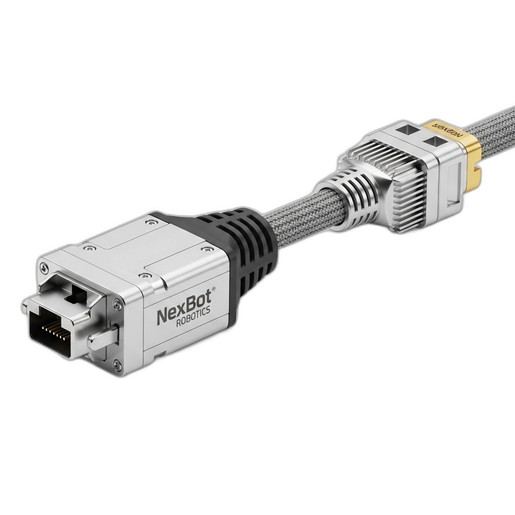
The NexBot R-20 communicates over PROFINET, a high-speed industrial Ethernet protocol. Reliable communication is non-negotiable for safety and performance. Use a high-quality, shielded cable designed for industrial environments. The NexBot PROFINET Patch Cable, 2m (NXB-CBL-NET-002) is engineered for this task, offering robust construction to resist oil, abrasion, and electrical noise common on the factory floor. Connect the cable from the robot controller's PROFINET port to your plant's network switch or PLC.
Finally, connect any peripheral I/O, such as sensors or actuators, to the appropriate terminals on the controller, ensuring all connections are secure.
Step 3: Power-On and System Initialization
With all physical connections made, you can perform the first power-on. Follow this sequence carefully:
- Ensure the workcell is clear of all personnel and tools.
- Verify that all emergency stops are functional but not engaged.
- Turn on the main disconnect to supply power to the robot controller.
- Power on the controller itself using the designated switch.
- Observe the teach pendant or control interface. The system will boot up and perform self-diagnostics. Monitor for any error messages or alarms.
- Once booted, verify that the controller has established a network connection. You should see a link status light on the PROFINET port and be able to 'ping' the robot's IP address from a networked computer.
Step 4: Mastering and Basic Configuration
Before the robot can move accurately, its position must be calibrated, a process often called 'mastering' or 'homing'. This establishes a known reference point for all axes. Follow the procedure in the user manual, which typically involves moving each joint to a specific physical mark or position and recording the encoder values.
After mastering, you'll need to configure basic parameters, most importantly the Tool Center Point (TCP). The TCP is the focal point of your end-effector—the tip of a welding torch or the center of a gripper. Defining it accurately is essential for the robot to move precisely relative to the workpiece. Use the teach pendant and the manufacturer-provided calibration routines to define the TCP's X, Y, and Z coordinates and orientation relative to the robot's wrist flange.
Step 5: Final Safety Checks and First Moves
Safety is paramount. Before programming any production tasks, thoroughly test all safety systems:
- Press each emergency stop button to confirm it halts robot motion immediately.
- Test safety gates by opening them during a slow-speed test run to ensure the robot stops.
- Verify that any light curtains or area scanners correctly trigger a system halt when breached.
Once you are confident in the safety systems, you can program a simple motion path. In a low-speed 'test' or 'T1' mode, carefully jog each axis to confirm its direction and limits. Then, execute your simple program, watching closely to ensure the robot follows the intended path without unexpected movements.
Conclusion: Ready for Production
By following these steps, you have laid a solid foundation for your NexBot R-20 automation system. A careful and methodical installation process not only ensures safety but also maximizes the robot's performance, accuracy, and operational lifespan. With the robot securely mounted, reliably connected, and safely configured, you are now ready to begin integration and programming for your specific production tasks.