Outdoor water trampolines offer a unique blend of fun, exercise, and social interaction, transforming lakes, pools, and beaches into vibrant recreational hubs. These inflatable trampolines are designed specifically for aquatic use, featuring buoyant materials, vibrant colors, and durable construction that ensure safe and exciting bouncing experiences on water. Whether you’ve just purchased a new water trampoline or are preparing for the summer season, proper setup is essential for safe use and optimal performance. This comprehensive installation guide will walk you through each step to get your water trampoline ready for endless aquatic fun.
Understanding Your Water Trampoline
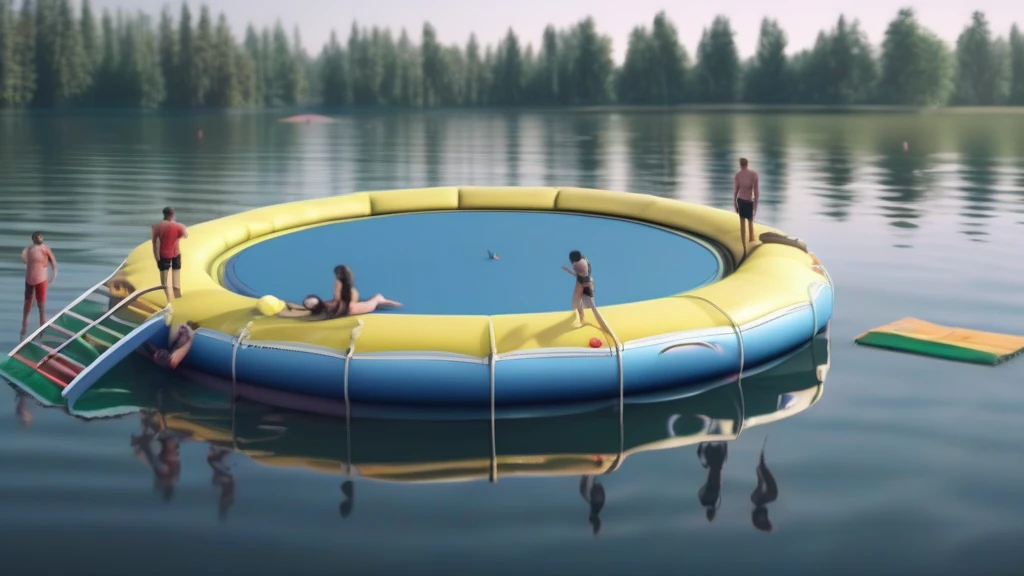
Before diving into the setup process, it’s helpful to familiarize yourself with the typical characteristics of water trampolines:
- Size and Capacity: Most models range from 8 to 12 feet in diameter, accommodating 2 to 4 users simultaneously.
- Materials: Made from durable, waterproof PVC or vinyl with reinforced seams to withstand water exposure and rough use.
- Colors: Often feature bright hues like blue, red, yellow, and orange for high visibility and aesthetic appeal on the water.
- Inflation System: Equipped with high-quality valves for quick inflation and deflation.
- Safety Features: Robust construction to provide a stable bouncing surface, often with multiple air chambers for added security.
Knowing these features helps in handling your trampoline correctly during setup and use.
Step-by-Step Installation Instructions
1. Choose the Right Location
Selecting an appropriate water area is the first crucial step:
- Water Depth: Ensure the water is at least 6 feet deep to prevent injuries from falls.
- Clear Area: Check for submerged rocks, branches, or debris that could puncture the trampoline or pose hazards.
- Calm Water: Lakes or protected bays are ideal, as strong currents or waves can destabilize the trampoline.
- Visibility: Position your trampoline in an area visible to swimmers or lifeguards for safety monitoring.
2. Unpack and Inspect
- Carefully remove the trampoline from its storage bag.
- Lay it flat on a clean, dry surface to inspect for any damage, holes, or weak seams.
- Check that all valves and inflation ports are intact and functioning properly.
- Confirm that accessories such as anchor kits or repair patches are included.
3. Inflate the Trampoline
Proper inflation is key to stability and durability:
- Use an electric or manual air pump compatible with your trampoline’s valves.
- Inflate each air chamber slowly, ensuring the material stretches evenly without overexpanding.
- Most water trampolines have multiple chambers; inflate each one fully before moving to the next to maintain balance.
- The trampoline should be firm but still slightly flexible to absorb bouncing forces.
- Avoid overinflation, which can stress seams and shorten product life.
4. Secure the Trampoline on Water
Stabilizing your trampoline prevents drifting and tipping:
- Anchor System: Use the included anchor kits or purchase compatible anchors designed for aquatic use.
- Attach anchor lines to the trampoline’s reinforced D-rings or anchor points, typically located around the perimeter.
- Drop anchors into the water at suitable distances, adjusting line lengths to keep the trampoline centered in place.
- Double-check that anchor lines are taut and evenly spaced to distribute tension.
5. Final Safety Checks
- Inspect the trampoline surface for wrinkles or uneven tension — smooth and even tension ensures safer bouncing.
- Verify that all valves are securely closed and leak-free.
- Test the trampoline gently to confirm it floats steadily without excessive tilting.
- Review safety guidelines for users, including maximum capacity and weight limits.
Tips for a Successful Setup
Handle Materials with Care
Water trampolines use heavy-duty PVC or vinyl that resists punctures, but sharp objects or rough handling during setup can cause damage. Avoid dragging the trampoline over abrasive surfaces and keep it away from sharp rocks or sticks.
Inflate Outdoors or Near Water
Inflating the trampoline close to the waterbody where it will be used minimizes transportation risk and makes launching easier.
Use a Quality Pump
Electric pumps designed for inflatable water toys speed up the process and ensure consistent inflation. Manual pumps are effective but require more effort and time.
Check Weather Conditions
Avoid setup during windy or stormy weather, as high winds can make inflation difficult and pose safety risks.
Maintaining Your Water Trampoline for Longevity
Proper setup is only the beginning — regular maintenance extends your trampoline’s life:
- Rinse with fresh water after each use to remove salt, sand, and debris.
- Dry completely before storage to prevent mold and mildew growth.
- Store in a cool, dry place away from direct sunlight to protect the PVC material from UV degradation.
- Inspect seams and valves periodically; patch any small holes promptly with a repair kit.
- Follow manufacturer guidelines for seasonal removal if you live in colder climates.
Conclusion
Setting up your water trampoline correctly is vital for safe, enjoyable aquatic recreation. By carefully selecting your location, inspecting and inflating your trampoline properly, securing it firmly on the water, and performing safety checks, you ensure hours of fun for family and friends. Adhering to maintenance best practices will keep your vibrant, durable water trampoline in top condition season after season.
With a well-installed trampoline, you’re all set to enjoy energetic bouncing, refreshing splashes, and memorable moments on the water — turning any lakeside, pool, or beach outing into an exciting adventure.